Thanksgiving Crafts Kids Will LOVE!
Posted
by
WinterKids
on Wednesday, November 27, 2013
Thanksgiving is a time for family, friends, fun and a big feast. Nothing is more warm and inviting than a homemade Thanksgiving dinner. Why should the decorations be any different? Add that handcrafted fall feel to your holiday lineup with these creative Thanksgiving table decorative crafts that will be an enjoyable activity for the whole family.
Crafty Turkey
What you'll need: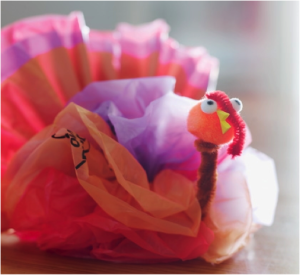
- 7 colorful plastic bags
- 3 pipe cleaners (at least one should be red)
- tacky glue
- 1-inch pom-pom
- 2 tiny white pom-poms
- yellow craft foam
- black marker
How to make it:
- Cut the handles and bottoms off 4 plastic bags. Trim the bags into 7- by 9-inch sheets and stack them, as shown. Starting on a short side, make 1-inch accordion folds.
- Tie the folded stack at the center with a pipe cleaner.
- Gently separate the layers, creating a puffy ball shape. With scissors, trim the body to the desired size.
- Make the tail: Cut the handles and bottoms off the remaining bags and trim them into 13- by 8-inch sheets. Starting on a short side, make 1-inch accordion folds. Tie the folded stack at the center with a pipe cleaner; do not separate the layers. Trim the tail to the desired size.
- Finish the turkey: Twist the pipe cleaners together to join the body and tail; this will also create the neck. Form a small loop at the neck's end. With tacky glue, adhere the large pom-pom to the loop. Glue on white pom-poms for eyes, a yellow foam beak, and a red pipe cleaner snood. Draw on the pupils.
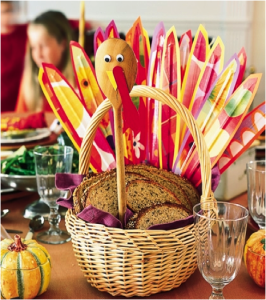
Turkey Breadbasket
 What you'll need: What you'll need:
- Large wooden spoon
- Tacky glue and a glue stick
- Pair of googly eyes
- Pencil and scissors
- Construction paper in a variety of colors
- Flat wooden craft spoon
- Red marker
- Colorful printed wrapping paper or pages from old magazines
- Waxed paper
- Thin wooden skewers (sold in the kitchen/cooking section of most grocery and department stores)
- Basket to serve as the turkey's body (it should be large enough to fit a loaf of bread or dinner rolls)
- Florists' foam or Styrofoam block (sold at many large craft or department stores) large enough to wedge into the basket
- Cloth dinner napkin
How to make it:
- To create the turkey's head, turn the large wooden spoon so that the back of the bowl becomes the face. Use tacky glue to stick on the googly eyes. Then cut out a yellow construction paper beak and glue it in place.
- For the turkey's wattle, use the marker to color the flat wooden craft spoon red. Glue the wattle onto the face at an angle so that the top slightly overlaps the beak. You can use a pinch-style clothespin to hold the pieces in place until the glue dries.
- From the construction paper, help your kids cut out lots of colored feathers that measure about 10 inches long and 1 3/4 inches across at the widest point. Cut out the same number of feathers from the wrapping paper or magazine pages, then trim them so that they are slightly smaller than the solid-colored ones.
- Cover a flat work surface with waxed paper (this makes for easier cleanup after applying glue), and you're ready to assemble the feathers. For each one, place a construction paper cutout on the waxed paper and set a wooden skewer atop it so that the blunt end is just below the top of the paper and the pointed end extends about 3 inches below it.
- Next, use a glue stick to coat the underside of a printed feather. Then press it, glued side down, onto the construction paper feather, sandwiching the skewer between the 2 layers.
- Wedge the foam block into the basket (trim it first if necessary). Push the spoon handle into one end of the block deep enough to secure it. Stick the feathers into the opposite end. Cover the block with the cloth napkin, and the turkey basket is ready to fill with bread.
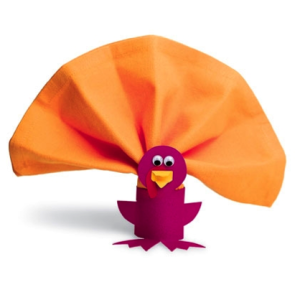 Turkey Napkin Holders Turkey Napkin Holders
What you'll need:
- 5- by 7-inch Colorful Poster Board
- Craft Knife
- Double-sided Tape
- Glue Stick
- 2 Googly Eyes (available at craft stores)
- Red and Yellow Construction Paper
How to make it:
- Cut head and feet shapes in the top and bottom edges of a 5- by 7-inch rectangle of colorful poster board, leaving a 2- by 7-inch center band.
- Use a craft knife to cut 2 wings near the center of the band.
- Curl the cardboard by wrapping the ends of the band around something round, such as a rolling pin. Remove the band, overlap the ends, and secure them with double-sided tape.
- Use a glue stick to attach 2 googly eyes, a red paper wattle, and a yellow paper beak. To adorn each mini tom with fancy feathers, simply fold a colorful napkin accordion style and tuck it inside the ring.
We are thankful for so many things here at WinterKids.com this fall season – friends, family, beautiful scenery and of course great kids winter apparel to keep us warm on those cold chilly days. What are you thankful for this holiday season?
Categories:
Family Fun
Tagged: kids, thanksgiving, family
« Previous Post
Next Post »
|